一、使用vite快速创建脚手架 1.使用yarn运行安装命令
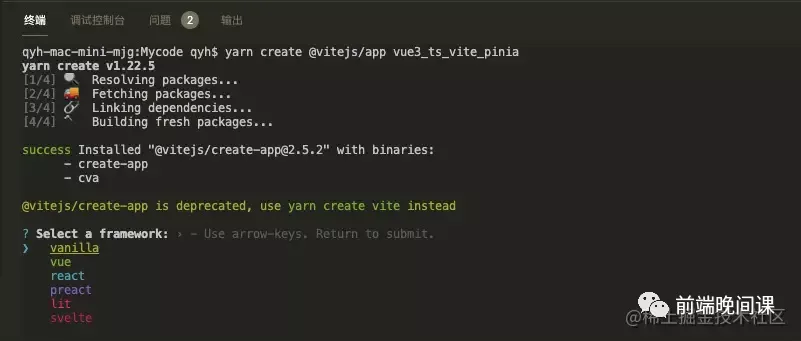
1
2
# yarn命令安装 yarn create @vitejs/app vue3_ts_vite_pinia
2.选择vue vue-ts 完成安装
3.进入vue3_ts_vite_pinia项目,使用yarn命令安装依赖,依赖安装完成后,使用yarn dev启动项目
1
2
# 安装依赖 yarn # 启动项目 yarn dev
二、路由配置(vue-router@4) 基本配置 1.使用yarn安装vue-router@4
1
2
# yarn命令安装 yarn add vue-router@4
2.src文件夹下新建router文件夹,router文件夹下新建index.ts
1
2
3
4
5
6
7
8
9
10
11
12
13
14
15
import { createRouter, createWebHistory, RouteRecordRaw } from 'vue-router' const routes: RouteRecordRaw[] = [ { path : '/' , name : 'Index' , component : () => import ('@/pages/index/Index.vue' ), } ] const router = createRouter({ history : createWebHistory(), routes, }) export default router
注:RouteRecordRaw为内置类型
3.在main.ts中,引入router并注册
1
2
3
4
5
6
import { createApp } from 'vue' import App from './App.vue' import router from './router/index' const app = createApp(App)app.use(router) app.mount('#app' )
4.在App.vue中设置路由展现出口
1
2
3
<template> <router-view></router-view> </template>
路由守卫 1.路由守卫,告别next,在router/index.ts中添加全局路由守卫
1
2
3
4
5
6
7
8
9
10
11
12
13
14
15
16
17
18
19
20
21
22
import { createRouter, createWebHistory, RouteRecordRaw } from 'vue-router' const routes: RouteRecordRaw[] = [ { path : '/' , name : 'Index' , component : () => import ('@/pages/index/Index.vue' ), } ] const router = createRouter({ history : createWebHistory(), routes, }) router.beforeEach((to,from )=> { if (pass){ console .log('pass' ) }else { return false } }) export default router
2.组件内路由守卫
新增组合式api可以替代原有的组件内守卫,onBeforeRouteLeave(离开当前页面路由时触发)、onBeforeRouteUpdate(路由更新时触发)
1 2 3 onBeforeRouteLeave((to,form )=> { })
页面使用 1 2 3 4 5 6 7 8 9 10 11 12 import { useRouter,useRoute } from 'vue-router' ; const go=()=> { const Router=useRouter() const Route=useRoute() Router.push({ name :'/login' , query :{ id :'123456' } }) }
三、状态管理(Pinia配置)
Pinia 是 Vue.js 的轻量级状态管理库,也是Vue核心团队推荐的状态管理库,由于Pinia也是Vuex研发团队的产品,以及尤大大的加持,极大可能会替代Vuex,即使pinia的推广不太顺利也并不用过多担心,其许多使用方式很有可能会移植到Vuex5中。相较于Vuex,Pinia上手更简单,mutations,并且actions支持同步或异步。
基本配置 1.使用yarn安装 pinia@next
1 2 # yarn命令安装 yarn add pinia@next
2.src文件夹下新建store文件夹,store文件夹下新建main.ts
1 2 3 4 5 6 7 8 9 10 11 12 13 14 15 16 import { defineStore } from 'pinia' export const useUserStore = defineStore({ id : 'user' , state : () => ({ name : '用户名' }), getters : { nameLength : (state ) => state.name.length, }, actions : { updataUser (data: any ) console .log(data) } } })
3.在main.ts中,引入createPinia
1 2 3 4 5 6 7 8 import { createApp } from 'vue' import App from './App.vue' import router from './router/index' import { createPinia } from 'pinia' const app = createApp(App)app.use(createPinia()) app.use(router) app.mount('#app' )
基本使用 1.获取state
1 2 3 4 5 6 7 8 <template> <div>{{userStore.name}}</div> </template> <script setup lang="ts"> import { useUserStore } from "@/store/user.ts" const userStore = useUserStore() </script>
1 2 3 4 5 6 7 8 9 10 <template> <div>{{name}}</div> </template> <script setup lang="ts"> import { useUserStore } from "@/store/user.ts" const userStore = useUserStore() const name=computed(()=>{ userStore.name }) </script>
结构获取,但会失去响应式,需要使用storeToRefs
1 2 3 4 5 6 7 8 9 <template> <div>{{name}}</div> </template> <script setup lang="ts"> import { useUserStore } from "@/store/user.ts" import {storeToRefs} from 'pinia' const userStore = useUserStore() const name=storeToRefs(userStore) </script>
2.设置state
1 2 3 4 5 6 7 8 9 10 11 <template> <div>{{userStore.name}}</div> <div @click="updateName">修改名字</div> </template> <script setup lang="ts"> import { useUserStore } from "@/store/user.ts" const userStore = useUserStore() const updateName = () => { userStore.name = '直接修改后名字' } </script>
1 2 3 4 5 6 7 8 9 10 11 12 13 <template> <div>{{userStore.name}}</div> <div @click="updateName">修改名字</div> </template> <script setup lang="ts"> import { useUserStore } from "@/store/user.ts" const userStore = useUserStore() const updateName = () => { userStore.$patch({ name: '$patch修改后名字' }) } </script>
1 2 3 4 5 6 7 8 9 10 11 <template> <div>{{userStore.name}}</div> <div @click="updateName">修改名字</div> </template> <script setup lang="ts"> import { useUserStore } from "@/store/user.ts" const userStore = useUserStore() const updateName = () => { userStore.updataUser('actions修改后名字') } </script>
actions中使用this修改state数据
1
2
3
4
5
6
7
8
9
10
11
12
13
14
15
16
import { defineStore } from 'pinia' export const useUserStore = defineStore({ id : 'user' , state : () => ({ name : '用户名' }), getters : { nameLength : (state ) => state.name.length, }, actions : { updataUser (newName: string ) this .name=newName } } })
3.Getters使用
1 2 3 4 5 6 7 8 9 10 11 import { defineStore } from 'pinia' export const useUserStore = defineStore({ id : 'user' , state : () => ({ name : '用户名' }), getters : { nameLength : (state ) => state.name.length, }, })
1 2 3 <template> <div>{{userStore.nameLength}}</div> </template>
4.Actions使用
如设置state中使用方式相同,可以直接使用this设置state中数据
支持async await ,支持同一个store中action之间可以用this调用,不同store中action之间可以用hooks引入方式调用
1 2 3 4 5 6 7 8 9 10 11 12 13 14 15 16 17 18 19 import { defineStore } from 'pinia' import {userOtherStore} from './otherStore' export const useUserStore = defineStore({ id : 'user' , state : () => ({ name : '用户名' }), actions : { async login (params ) const {data}=await api.login(params) this .updataUser(data) }, updataUser (newName: string ) this .name=newName const otherStore=userOtherStore() otherStore.setName(newName) } } }
四、统一请求封装(Axios封装) 1.使用yarn安装 axios
1 2 # yarn命令安装 yarn add axios
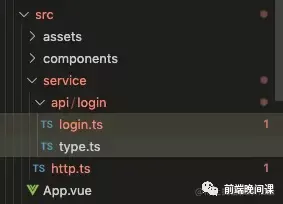
2.src文件夹下新建service文件夹,service文件夹下新建http.ts
1 2 3 4 5 6 7 8 9 10 11 12 13 14 15 16 17 18 19 20 21 22 23 24 25 26 27 28 29 30 31 32 33 34 35 36 37 38 39 40 41 42 43 44 45 46 47 48 49 50 51 52 53 54 55 56 57 58 59 60 61 62 63 64 65 66 67 68 69 70 71 72 73 74 75 76 77 78 79 80 81 82 83 84 85 86 87 88 89 90 import axios, { AxiosRequestConfig } from 'axios' axios.defaults.baseURL = '/api' ; axios.defaults.timeout = 2500 ; axios.defaults.headers.post['Content-Type' ] = 'application/json;charset=UTF-8' ; axios.interceptors.request.use(function (config ): AxiosRequestConfig <any > config.headers.token = 'your token' return config; }, function (error ) return Promise .reject(error); }); axios.interceptors.response.use(function (response ) return response; }, function (error ) return Promise .reject(error); }); interface ResType<T> { code : number data?: T msg : string err?: string } interface Http { get<T>(url: string , params?: unknown): Promise <ResType<T>> post<T>(url: string , params?: unknown): Promise <ResType<T>> upload<T>(url: string , params : unknown): Promise <ResType<T>> download(url: string ): void } const http: Http = { get (url, params ) return new Promise ((resolve, reject ) => { axios .get(url, { params }) .then((res ) => { resolve(res.data) }) .catch((err ) => { reject(err.data) }) }) }, post (url, params ) return new Promise ((resolve, reject ) => { axios .post(url, JSON .stringify(params)) .then((res ) => { resolve(res.data) }) .catch((err ) => { reject(err.data) }) }) }, upload (url, file ) return new Promise ((resolve, reject ) => { axios .post(url, file, { headers : { 'Content-Type' : 'multipart/form-data' }, }) .then((res ) => { resolve(res.data) }) .catch((err ) => { reject(err.data) }) }) }, download (url ) const iframe = document .createElement('iframe' ) iframe.style.display = 'none' iframe.src = url iframe.onload = function ( document .body.removeChild(iframe) } document .body.appendChild(iframe) }, } export default http
3.service文件夹下新建api文件夹,做请求统一管理,api下新建login,login下新建login.ts、type.ts
1 2 3 4 5 6 7 import http from '@/service/http' import { ILoginApi } from './type' const loginApi: ILoginApi = { login (params ) return http.post('/login' , params) } }
1 2 3 4 5 6 7 8 9 10 11 12 13 14 15 export interface DataType { name : string } export interface ResType<T> { code : number data?: T msg : string err?: string } export interface ILoginApiParams { id : number } export interface ILoginApi { login : (params: ILoginApiParams ) => Promise <ResType<DataType>> }
五、UI组件库(Naive UI、Ant Design Vue、Element Plus)
UI组件库目前选择比较多,Naive UI是尤大大推荐的组件库,内容样式比较美观新颖,但毕竟是新组件库,Ant Design Vue是Ant Design 的 Vue 实现,用户人数较多,比较成熟,像一些目前比较厉害的开源后台vben-admin等都是使用Ant Design Vue,至于Element Plus也是刚刚开发完成,因此还是选择Ant Design Vue较为靠谱。
基本配置 1.使用yarn安装 ant-design-vue@next
1 2 yarn add ant-design-vue@next
2.main.ts中全局注册
1 2 3 4 5 6 7 8 9 10 11 12 import { createApp } from 'vue' import App from './App.vue' import router from './router/index' import { createPinia } from 'pinia' import Antd from 'ant-design-vue' ;import 'ant-design-vue/dist/antd.css' ;const app = createApp(App)app.use(createPinia()) app.use(router) app.use(Antd); app.mount('#app' )
3.组件内使用
1 2 3 4 5 6 7 8 9 10 11 <template> <div :style="{ background: 'rgb(190, 200, 200)', padding: '26px 16px 16px' }"> <a-button type="primary" ghost>Primary</a-button> <a-button ghost>Default</a-button> <a-button type="dashed" ghost>Dashed</a-button> <a-button danger ghost>Danger</a-button> <a-button type="link" ghost>Link</a-button> </div> <!-- <img alt="Vue logo" src="./assets/logo.png" /> <HelloWorld msg="Hello Vue 3 + TypeScript + Vite" />--> </template>
六、环境变量配置及vite基本配置 环境变量配置 1.最外层文件位置新建.env.development及.env.production文件
1 2 3 NODE_ENV=development VITE_APP_WEB_URL= 'YOUR WEB URL'
1 2 3 NODE_ENV=production VITE_APP_WEB_URL= 'YOUR WEB URL'
2.组件内使用环境
1 console.log(import.meta.env.VITE_APP_WEB_URL)
Vite环境配置 1.配置类型别名
1 2 3 4 5 6 7 8 9 10 11 12 13 14 import { defineConfig } from 'vite' import vue from '@vitejs/plugin-vue' import path from 'path' export default defineConfig({ plugins : [vue()], resolve : { alias : { '@' : path.resolve(__dirname, 'src' ), }, }, })
如果path报错,安装@types/node即可
2.引入如scss等的全局样式
1 2 3 4 5 6 7 8 9 10 export default defineConfig({ plugins : [vue()], css : { preprocessorOptions : { scss : { additionalData : '@import "@/assets/style/main.scss";' } } }, })
3.代理配置
1 2 3 4 5 server: { port : VITE_PORT, proxy : {}, },
4.在预构建中强制排除的依赖项。
1 2 3 4 5 6 7 8 9 10 11 optimizeDeps: { include : [ '@iconify/iconify' , 'ant-design-vue/es/locale/zh_CN' , 'moment/dist/locale/zh-cn' , 'ant-design-vue/es/locale/en_US' , 'moment/dist/locale/eu' , ], exclude : ['vue-demi' ], },
5.build打包
1 2 3 4 5 6 7 8 9 10 11 12 13 14 15 build: { target : 'es2015' , outDir : OUTPUT_DIR, terserOptions : { compress : { keep_infinity : true , drop_console : VITE_DROP_CONSOLE, drop_debugger : VITE_DROP_DEBUGGER }, }, brotliSize : false , chunkSizeWarningLimit : 1500 , },